With the nice climate of California, due to the high
pressure center
off of the coast that dominates the prevailing flow for most of the
year,
and access to Hidden Hill Observatory (a reasonably dark observing
site in the San Francisco Bay area with access being a benefit of
membership in the Tri-Valley
Stargazers (TVS)),
I've been doing various forms of astrophotography since 1992. My
main interest is
photographing
emission and reflection nebula, although I have also photographed
galaxies. With my recent acquisition of a Coronado SM-60
Hydrogen alpha (H-alpha) filter, solar observing has become part of my
schedule, and my sleep deprivation has increased!
This hobby requires lots of patience as the exposure times for deep-sky objects range from about 1 hour to 3 hours!. All the while one must keep a guide star centered on the illuminated crosshair of a high power eyepiece by manually entering corrections to the motor drive, which tracks the stars as they move across the sky due to the Earth's rotation. I followed this procedure for many years as I honed my skills, but eventually freezing my tail off while hovering over the eyepiece on long winter nights lost its appeal. With the purchase of a Santa Barbara Instrument Group (SBIG) ST-4 autoguider, the quality of my photographs has improved due to more accurate guiding. This is a charged coupled device (CCD) that automatically makes guide corrections on a guide star of my choice. The added benefit is that I'm able to take a cat-nap in my truck while the ST-4 does the tedious work, and this makes for a much less risky drive down the mountain in the morning.
In 1994, my first concerted effort at deep-sky
consisted of piggyback photography.
I mounted my 35mm camera with a 50mm or 90-230mm telephoto lenses
attached onto the top of my Meade Schmidt-Cassegrain telescope.
Sweeping vistas of the night sky are possible with this configuration
including wide-field views of the Milky Way. With the 50mm lens one can
capture a field of view (FOV) of about 28 degrees on film, while with
the telephoto set at 230mm, about 8.75 degrees of sky is visible. With
the telephoto lens and color film one can obtain photos with a
reasonable image scale of the North American Nebula (NGC7000), the
Orion Nebula (M42), the Andromeda Galaxy (M31), or even comets. Others,
such as
Chuck Vaughan, have used
high-end telephoto lenses with hypered
Kodak Tech Pan b/w film and a nightime Hydrogen alpha filter (beware, not the type used for solar
observing or solar astrophotography!!!)
to obtain extremely rich photos of nebulosity and star fields.
Piggyback astrophotography is also great for capturing meteor trails.
This is the simplest form of guided astrophotography, and due to the
difference in magnification between the camera and the guiding
telescope,
errors in guide corrections have a minimal impact, provided you have
good polar alignment. For example, during 1997 I was taking a piggyback
photo of Comet Hale-Bopp during very windy conditions. As a result the
comet nucleus jumped about the field of view, well outside the
crosshairs of the guiding eyepiece (since the comet moves relative to
the stars I guided on the nucleus). I thought the photo would be
trash, but to my great surprise it came out fantastically (at least
from a guiding point of view).
My initial foray with piggyback astrophotography
gave me the time to develop two crucial skills for obtaining successful
astrophotos, (1) accurate polar alignment: the better your polar
alignment, the fewer guide corrections you have to enter, and (2)
experience entering guide corrections. With the favorable image to
guide ratio (discussed above) you to can successfully photograph the
beauty of the night sky with a little practice. With encouraging
results, the next logical step is prime focus astrophotography in which
the optics of the telescope are used in place of the camera lens. In
this case I attached my 35mm camera body to a Lumicon Giant Easy Guider
on my Meade 10" f/10 Schmidt-Cassegrain telescope. The easy guider
contains a focal reducing lens that gives a larger field of view (~1
degree of sky) and a faster focal ratio (~f/6.3). Since the
exposure
time goes as the square of the focal ratio, the focal reduction cuts
the
necessary exposure time drastically. For example, at f/6.3, a good
beginning exposure time would be about 40 minutes. The same photo at
f/10 would take 100 minutes to achieve the same color saturation and
brightness as the f/6.3 photo (assuming reciprocity failure of the film
remains unchanged). With the easy guider, the guiding eyepiece is
located in front of the focal reducing lens, thus guiding is performed
at f/10 while the photo is taken at f/6.3. Thus, the added
magnification of the guiding eyepiece gives a better chance of
obtaining an accurately guided photo, provided your guiding technique
is up to snuff. Using a light pollution filter, such as the Lumicon
Deep-Sky filter or the IDAS LP-1, enables one to take exposures up to 3
times longer. These filters are most useful for photos emission nebula,
but depending on the film used a color shift may result. Numerous
articles in astronomy magazines compare
results using different films and filters. I have used this
configuration to photograph emission and reflection nebula, planetary
nebula, galaxies, and the moon.
After years of astrophotography using my
Schmidt-Cassegrain, I longed for widefield photos of the Veil Nebula
(NGC 6992, 6995, 6960 are the brighest portions; 6974, 6969, and
Pickering's Triangular Wisp are more elusive). To me, the Veil Nebula
has almost become an obsession, both visually and photographically. To obtain these images, I
acquired a 4" Takahashi refractor. The Veil
Nebula is the result of a
shockwave from a 30-40,000 year old supernova remnant that is impacting
dense regions. This causes the gas to fluoresce, giving rise to regions
of lacey
beauty that in my opinion are unrivaled in the Northern Hemisphere.
From my observing site an Oxygen III filter (I own the Lumicon OIII
filter) provides the necessary contrast for visual observations. The
OIII filter isolates the two doubly ionized lines of oxygen at 496 and
501 nanonmeters that dominate the emission of planetary nebula. It
suppresses starlight and light pollution that compromise the sharp
contrast that is necessary to observe these phenomena. As I became more
experienced over the years, I no longer needed the OIII filter to see
the brightest portions of the Veil Nebula. However, using the OIII
filter has always improved the views I have had.
The OIII filter is not used in photographic applications.
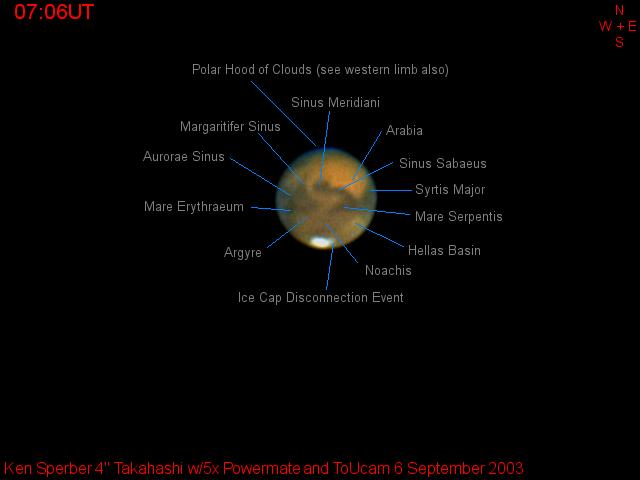
Recently, I have been using a Phillips ToUcam Pro
(your typical "watch the coffee pot" webcam) for digital imaging. This
was inspired by the presentation of Gert
Gottschalk and Sibylle Frohlich at the April
2003 TVS meeting. They showed fantastic solar, lunar, and planetary
images made using a ToUcam, and with the impending Mars opposition in
August 2003, I
decided then and there that I had to try my hand at it. I thank Gert
and other TVS members
for helpful hints on set-up and image processing.
Telescopes:
1) Meade 10" f/10 LX-200 Schmidt-Cassegrain telescope equipped with a
Lumicon
Giant Easy Guider to reduce the focal ratio to ~f/6.3 (FOV ~1 degree).
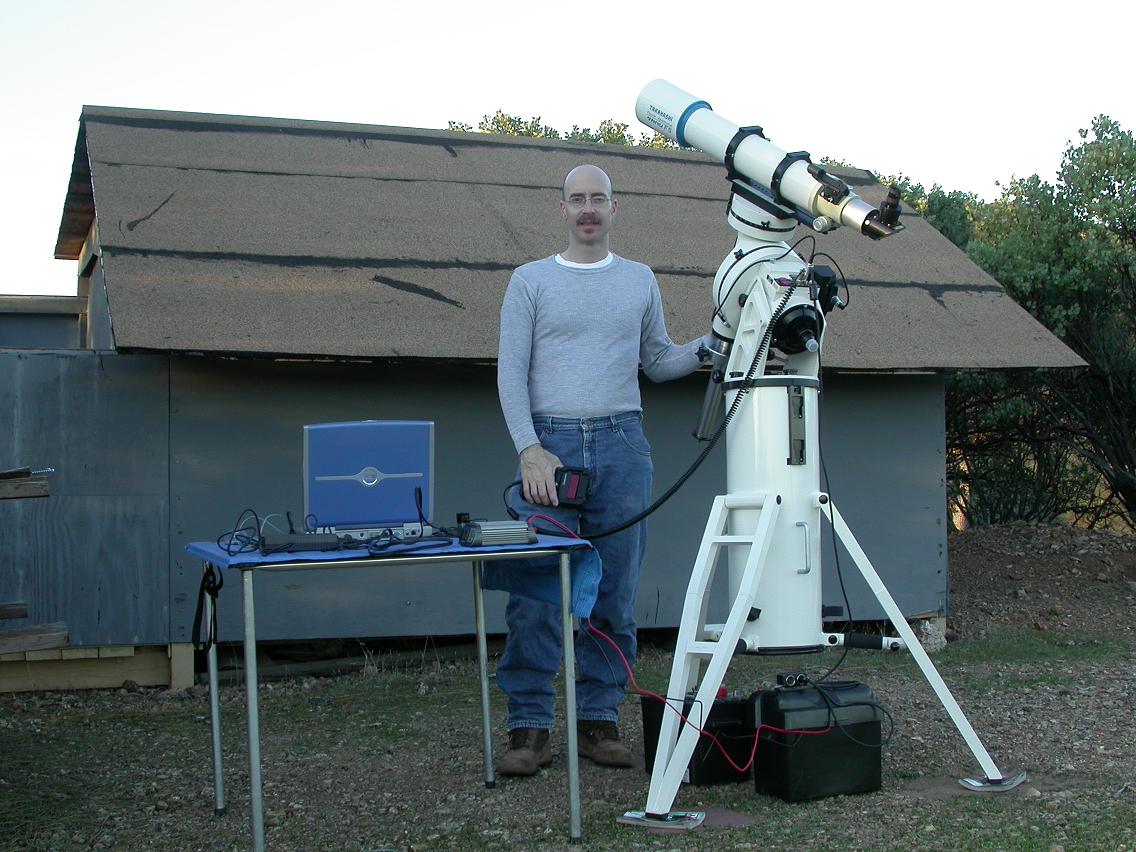
2) Takahashi FS-102 4" f/8 refractor
I use this telescope in the standard f/8
configuration
(FOV ~2.8 degrees) and with an f/6 focal reducer for wider field
astrophotos (FOV ~3.25 degrees).
 |
 |
3) Meade 8" f/6 Newtonian reflector (used mainly for
solar photography with a Thousand Oaks white light filter, see below).
4) TeleVue Pronto 70mm f/6.8 refractor
Mounts (see
pictures above):
AP1200 and AP900 GOTO Mounts: Eventually, I will
put a 12.5" Optical Guidance Systems Ritchey-Chretien on the AP1200. In
the mean time I will use these mounts with the Takahashi
Losmandy G-11: this is the mount for the Takahashi
and Pronto refractors
Filters:
1) Astrodon LRGBCHa for color imaging with my SBIG ST-2000XM
2) Astronomik IR-Block filter for planetary and
lunar ToUcam CCD imaging
3) Lumicon Deep-Sky and IDAS LP-1 light pollution filters for film photography of emission nebula
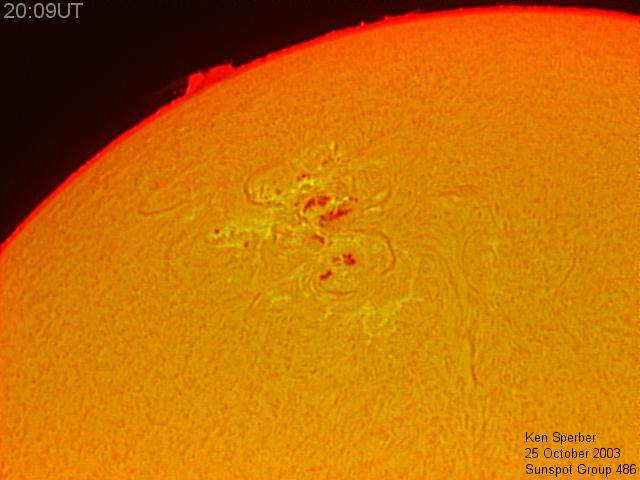
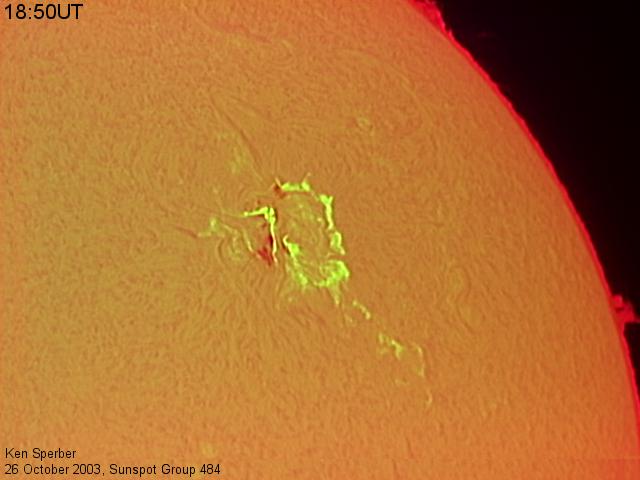
3) Coronado SM-60 Hydrogen alpha filter for solar
astrophotography/imaging. This filter has a bandpass of <0.7
angstroms
centered at 6562.8 angstroms and is used to visualize sunspots,
faculae, filaments, flares, prominences, and coronal mass ejections.
With the included T-Max tuner, the interference filter can be manually
tilted to detune the filter to shift the central pass band to better
visualize doppler shifted features such as flares and coronal mass
ejections
4) Thousand Oaks broadband solar filter
All photos are copyright K.
R. Sperber